Sunday, 20 May 2012

Evaluation


Making the robes for the Mayor of Bournemouth has been a massive learning curve for me.
I initially wanted to do this project in order to learn how to make replica garments. I feel that in a way I have done this or I have certainly learnt techniques that will help me in the future.  I was disappointed that in the end I had to settle on not making a replica and just making an interpretation. In hindsight I feel it would almost be impossible to create a replica without the original with you but I feel we have managed to make a fairly faithful interpretation.

We put a lot of time and effort into drafting the pattern for this gown. I was surprised by just how complicated the construction was, particularly with the sleeves and I had never seen a sleeve constructed this way before. What I found particularly challenging when drafting was not working with a reference. There were also elements of the gown where I was confused to why they had done such things on the original such as fold under some velvet ribbon on the top sleeve. This experience has made me a lot more confident in my drafting and I now feel that after this years practice I could tackle any design of costume.

There have been many valuable experiences such as working with a proper client as well as learning how to cartridge pleat. I am pleased with the pleats as a first attempt and would like to develop my technique in the future so that the pleat are perfectly smooth.

The part of the project that I am most proud of is that we managed to construct the robe almost independently. We didn’t rely on a tutor for support and when faced with problems we managed to figure them out. I think this has helped me to develop my initiative and logic when it comes to pattern construction. I do however that this method of trial and error was slow. There were points where I think we probably needed some support to get answer faster.

I think time was an issue on this project but I think this in a way reflects the real world. We had problems with deliveries arriving late and Abi was away on work experience, both of which we had to work around. Also the Mayor was ill for our second fitting which put us behind by about a week. These problems I think are just something you have to deal with and be flexible around and I think we learnt quickly how to be adaptable and roll with the punches.

I am pleased that I was able to work with a partner on this project and Abi and I worked well together. It meant that we could bounce ideas off one another until we solved the problems. We tried to delegate jobs so that we worked efficiently and didn’t get in each other’s way when making the final gown. With the toile we were keen to learn all the techniques each and so we did most of it together and I think I can safely say that I now understand this gown in detail. I am quite a perfectionist when it comes to finishes and I feel we were let down a bit there. I am used to having control over the garments and I am making whereas in this project I adjusted to sharing responsibility.

I have been trying to immerse myself in the subject by visiting London and reading books and I think I have discovered a lot considering that this area is so rarely written about. I love research and this has been incredibly frustrating as I have just been searching for where the origins of the silhouette may have come from. I really enjoyed going to the National Art Library. It was an environment that I loved and this, along with the lectures I’ve attended has made me more determined to carry on my studies into postgraduate level.

I am pleased that the final robe is lightweight for summer use as this was one of the main aspects of the brief and the Mayor was happy with it which was essential. I would have liked to have more time for finishing the gown to a high standard which is where I feel we let the garment down.

In the future I think I would like to work on a more collaborative project. I think at times Abi and I felt like we hadn’t seen anyone in days whilst we worked. In Battle for the Winds I enjoyed liaising with people and this is something I would like to do again as I feel my confidence has grown over this project.

Saturday, 19 May 2012

A History of Legal Dress in England


From the 13th century there is evidence that robes for Judges were made for summer and winter use. The summer robes required ‘half a short cloth and one piece of fine linen silk ‘ and for winter, ‘another half of a Cloth colour Curt, with a hood and 3 pieces of Fur of white Budge.’ At this time legal dress was not confined to certain colours like other areas of society. Green was favoured however, but colours varied according to the whim of the king and the dress for a long time was still influenced by fashion.

Armelausa became to be particularly associated with judges. This was a loose mantle fastened on the right shoulder, originating from lorum, which were worn in the Byzantine Empire. Armelausa would have been presented to judges as part of their livery by kings.

In the 15th century the dress of judges became quite fixed. They wore a skull cap, a coif, a shoulder piece with a miniver hood, a short flat liripipe (a long tippet like hood) and a long supertunica with close sleeves. Scarlet became adopted universally for the colour of full dress of judges and lesser judges wore dress of mustard colour with the same components of dress apart from a sleeveless tabard was never worn.
In 1635 a decree was made titled the Discourse on Robes and Apparel.


I have found it interesting looking into legal dress briefly as I have learnt a lot of new names for historic garments and have broadened my knowledge of costume from the 13th to 15th centuries.

Friday, 18 May 2012

Finished Robe!


I have mixed feelings about this robe; though I am very proud that we managed to recreate this robe independently with hardly any assistance I feel that some of the finishes could have been better.

We have been in the studio a lot to make sure the robe was finished as soon as possible however we kept on running across problems we hadn’t planned for and so we had to unpick a lot of seams. This put us behind schedule and though we worked very hard the finishing touches were left until too late. There was a lot of hand stitching to do at the end and because of time restraints quality lagged. I know that if I had had the time these hand stitched seams would have been strong and neat.

I am really pleased with how the pleats turned out and the fabric works really well to optimise the quality of the silk. I was pleased with the pattern cutting and how we overcame problems. The fur and the velvet looked really good I thought and I am proud that we managed to get on top of a very complicated sleeve.
Putting the sleeve into the armhole was a nightmare. There is a point where the wing meets the curve of the sleeve and we couldn’t get these points on our two sleeves to match which is a shame. I don’t think this is noticeable when the sleeve is on but I know it’s there.  

I think that with time however I will be able to step back from the robe and be pleased with what we have achieved. 

Tuesday, 15 May 2012

Fur issues

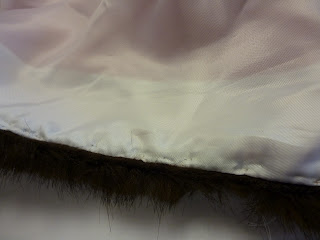
Another issue we have had is how to attach it down the CF of the robe.
On the original it was sewn down both edges. We therefore thought we should  sew the fur on right sides together and then catch the other edge in the CF with the lining.

We cut the fur in half and sewed that together at the CB at a bit of an angle to help it bend around the curve of the shoulder.


When Abi basted it down flat however it pulled the silk into an inverted triangle silhouette.
We asked Kat about this and she said that it was because the weight of the fur didn’t match the weight to the silk and so it pulls at it.
The best way to resolve this would be to create a collar and then swing catch it down to the CF.


We therefore cut out a long facing out the spare fabric we had, which we ironed interfacing to.


We then sewed the fur to the facing, right sides together and basted the fur to the facing so that it laid flat.


We then sewed the fur collar to the CF and stabbed stitched around edge to make the opening neat.


The amount of issues that we had to overcome has been problematic and set us behind our schedule, which in the long run means the last stages will need to be rushed. However I am proud that we managed to overcome and work with the problems that arose. I think my problem solving skills and initiative have definitely improved and I think the solutions we did we creative but in keeping with the robe. 


Curving the Ribbon


On the original gown the velvet ribbon curves around the curve of the wing smoothly. I tried to pin the velvet trim around the curve but couldn’t do this without making pleats as it is not on the bias. I therefore decided to sew the bottom of the curve and then do all the corners before returning to the top of the curve. 


I spoke to Kat about this issue in case there was method of getting the velvet to curve. She told me there was nothing I could do and that I should form small pleats around the curve at regular intervals and that if both sides were the same and all equally spaced then it would look neat and not be noticeable.
I thought that this was the best option and therefore measured 10cm in from the corner of the trim and then placed pins at 2.5cm intervals. I had to experiment with  how was best to spread the pleats and how big each should be. In the end I decided that about 5mm should be pleated every 5cm.


I am pleased with how the pleats have turned out. I think they are barely noticeable and certainly won’t be obvious in photographs of the Mayor. 

Saturday, 12 May 2012

Never spill water on silk...

I have had a very steep learning curve today.

Yesterday I accidently spilt water on the sleeve I have been working on. After initial panic I decided to leave it overnight to see how it would react. I was not sure what to do at the time and thought it best to not get heat by it, which in hindsight was sensible.
Whereas if the robe was cotton the water would have dried without trace silk, silk is delicate and can be stained with water.


The robe was left with a water mark the next day. Though I knew it wouldn’t be very visible over time and without studying the sleeve very closely you can’t see it, however I did not think it was very fair to sell a client a garment with a stain on it.


I thought it would be hard to do stain removal methods without jeopardising the fur and velvet. If I were to remove them the unpicking may affect the appearance of the silk as the embellishments are central in the panel.

I therefore, after consideration, decided to order 50cm more silk and do this section again. I will however be looking into how to remove water stains and try and get this one out so I can use it on a different project possibly.

When ironing the wing to try and get some creases out Abi burnt a section of the fur. The heat of the iron melts the hairs as they are faux, it was right in the middle and we tried to work out a way of remedying it however there wasn’t a way without joining it in the middle which would have looked messy, therefore Abi ordered a metre more fur.
It is really hard working with fur, silk and velvet so closely together. The silk and the lining crease very easily however the fur cannot be ironed and the velvet needs to be ironed on a board and so the combination of the 3 is difficult.

In hindsight it is these mistakes that we made that set us behind our schedule and therefore meant that our finishing hand stitches were not up to standard.

Friday, 11 May 2012

One week to go!

This week has been hectic.

After the fitting went so well on Tuesday morning we came back to the studio to start work on getting the robe finished. My first job was to make the right hand sleeve. It was left unaltered at the fitting so it was just a matter of replicating the other. I find the sleeve construction quite complicated. We realised after the toile fitting that the top sleeve of the silk is top-stitched to the lining of the hanging sleeve down the middle in a curve. It is quite complicated to do as we needed to match the curves on both sleeves as well as stretch a smaller curve of red over a larger amount of lining, which takes some manoeuvring.

When I sewed this line it puckered the lining. I think the needle may have not been sharp enough or the tension on the machine too tight but I felt the lines were quite obvious and ruined the aesthetic of the sleeve. It would be seen on the front of the sleeve and therefore I decided to cut out another piece of lining and do it again. I think this was a sensible decision as I did not want to jeopardise the appearance of the garment with a small correctable mistake.
Since this I have been making sure needles are sharp and replacing any that aren’t to prevent this from happening again.

I think the top-stitching looks neat on the corrected sleeve and the curve is smooth.


I next sewed the thin fur around the edges of the sleeves. We decided to join the fur like this rather than in a triangular join as we thought the fur looked smoother.
We didn’t know how to attach the fur as we have never worked with any before. A lot of the work we have done have been educated guesses or trials backed up with research. It is not the most efficient way of working as it means we often have to undo our work but this is titled the Self
Directed Project and we have been proud of how independently we have been working.

I think the corners look quite neat and the fur has gone around the curve neatly