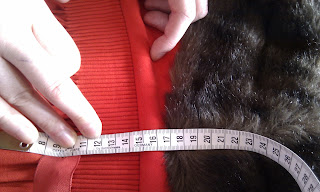
We were aware that our gown wasn't quite right and so were prepared to make alterations to our patterns when looking again at the original gown. We knew the front pattern needed definite alterations as well as the curve on the wing.
As these photos show, the robe we made was far too short and I can only presume this is because we used the measurement without the extension when making our pattern. The Mayor also commented that it was too tight across the back.
Our yoke needed little alteration, we changed the curve slightly on the arm and took about a centimetre from the front shoulder seam. Therefore the width of the across back was correct on our gown. What I think made the gown feel tighter was the positioning of the arms. We had measured the gown from the inside and thought there was a dart down 40cm from the pleating. We therefore added this and sewed the wing into the side seam. We realised on this fitting that this was very wrong. The thing we thought was a narrow dart was in fact where the wing was added to the body of the gown. This was a daft mistake in hindsight however it is understandable as were measuring initially under quite some pressure and therefore missed this complication.
 |
| Drawing the curve of the wing and yoke seam onto the pattern. |
 |
| Drawing the angle of the top sleeve and hanging sleeve seam onto the pattern. |
We remeasured the front body panel as we knew the curve of the armhole was drastically wrong. We remeasured the CF and side seams and then measured across the garment to the sleeve every 10cm. This was quite an accurate method of describing the curve as it was measured from a fixed position. This was similar to how you would draw a pattern from a block except that the top of the CF is slightly curved inwards.
 |
 |
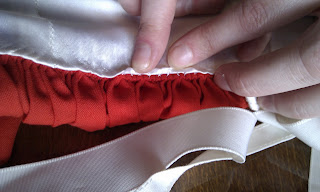
In this fitting we tried to look a bit more at construction details. For instance under the lining on the yoke you can see that the pleats have been made with another layer of fabric to make them thicker. We also noted down which seams of the lining had been sewn by machine and then which were hand sewn (for instance the edge of the wing with fur) so then we can replicate this
 |
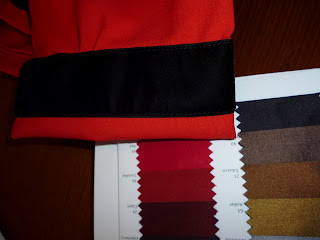
| Samples of silks next to the original red showing the difference in colour. |
With the samples I had loaned from the archive and the samples I got in London we had quite a large selection for the Mayor to look at. He was most interested in the silks and matching the colour of the reds perfectly. It was interesting to see how few samples actually did match the garment, without a swatch of the actual fabric I was going to fabric shops with my photos from the first meeting and an idea of the tone in my head, not realising until later what a variety of similar brilliant reds and scarlet I had got.
He decided upon the middle sample from Berwick Street Cloth House which is a lovely silk and £50 a metre.
The sample of the fur I got from Barnett Lawson was similar but too think and a slightly lighter tone. We decided upon the fur from MacCulloch and Wallis, which is 14cm in width, we thought this would be more accurate and after sewing we might loose the extra centimetre so that it is the same.
The first fitting was a bit daunting in the amount that we had to adjust and it has made me a bit anxious to get on and fix our mistakes. I am pleased with the fabrics that have been chosen as I think they will work well together and be relatively nice to work with. I am excited to gain experience of working with fabrics I have never used before such as fur. I am unsure at the moment if there are special processes that we will have to learn but I shall take it all in my stride!


No comments:
Post a Comment