Showing posts with label SDP001 Planning. Show all posts

Tuesday, 15 May 2012

Fur issues

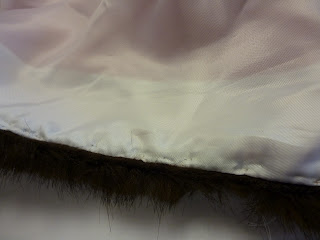
Another issue we have had is how to attach it down the CF of the robe.
On the original it was sewn down both edges. We therefore thought we should  sew the fur on right sides together and then catch the other edge in the CF with the lining.

We cut the fur in half and sewed that together at the CB at a bit of an angle to help it bend around the curve of the shoulder.


When Abi basted it down flat however it pulled the silk into an inverted triangle silhouette.
We asked Kat about this and she said that it was because the weight of the fur didn’t match the weight to the silk and so it pulls at it.
The best way to resolve this would be to create a collar and then swing catch it down to the CF.


We therefore cut out a long facing out the spare fabric we had, which we ironed interfacing to.


We then sewed the fur to the facing, right sides together and basted the fur to the facing so that it laid flat.


We then sewed the fur collar to the CF and stabbed stitched around edge to make the opening neat.


The amount of issues that we had to overcome has been problematic and set us behind our schedule, which in the long run means the last stages will need to be rushed. However I am proud that we managed to overcome and work with the problems that arose. I think my problem solving skills and initiative have definitely improved and I think the solutions we did we creative but in keeping with the robe. 


Thursday, 3 May 2012

Second Fitting Set Back

Today we went to our second fitting, though unfortunately, due to unforeseen circumstances the Mayor couldn't be there and we have had to reschedule to next Tuesday.

We have re-jigged our plan to get the work done in time but unfortunately there is little else we can do until we have had the fitting as we do not want to start finishing anything in case there are alterations and we would have to back track. So for now we are going to continue with our essays and hope that Tuesday is successful!

Tuesday, 1 May 2012

Cutting into Top Fabric

For the last two days we have been cracking on with making the real garment. Our fitting is on Thursday and because of Abi's work experience we had planned to leave the construction to the three days prior to the fitting and really focus on getting it done, which we are on track with.

On Monday we ironed and laid down the fabric and planned how best to cut out the patterns. We covered the table in paper so that no dirt would get onto our fabric. We folded the back panel until it fitted on the folded fabric (as discussed in an earlier post). We decided to leave it as big as possible and have a smaller seam allowance on this pattern, we do not think any adjustments will need to be made and so this will be fine. On the other panel pieces we decided to leave 5cm allowance where possible, just to check our backs, in case anything was wrong.
We are left with about 50cm excess fabric after laying out the pattern pieces, which is good and hopefully we will not need it!
We then cut out the pieces, chalked them and tacked them where appropriate.

It is very nerve racking cutting into £50 fabric. It's essential not to make any mistakes as it would be so costly to replace.


Right side of pleats 0.5cm apart with one layer of wadding
Wrong side of pleats 0.5cm apart with one layer of wadding
Right side of pleats 0.75cm apart with 2 layers of wadding.
Because we altered the width of the back panel this meant that less fabric was to be pleated to the yoke and therefore our samples from before were no longer relevant. We decided to do 2 more experiments, as shown above, one where we added more wadding and the other where we made the pleats smaller. We calculated that every 3.3cm of fabric on the back had to be pleated into 1cm to be sewn to the yoke.
The 0.5cm sample worked well, the 0.75 fitted to the right size but the wadding means the pleats are not tubular and look quite irregular. 
We ironed stayflex to the back seam allowance of the pleats as I noticed that most historic garments had pleated with canvas. This has made the pleats more stiff which looks good. We therefore decided to iron stayflex to the front and seam allowance of the robe where we are going to pleat. (see below)

Stayflex ironed to the seam allowance and top of the back panel. 
Paper guide 
Finished stitching 
Remove the paper 
Pulling the pleating together - bunching up 
Finished pleats! 
We had been practising different ways of using a guideline so that all our pleats were evenly space and straight. On the toile we just drew the grid formation onto the fabric and then sewed. Though we then covered this with wadding and seam allowance so it was hard to follow anyway.
We decided in the end to make a large paper grid to sew through and then we could rip it off. This worked well, though you had to pay attention to what was also happening with the stitching on the reverse as Abi had to undo a whole row of stitches as they were uneven.

One thing that we cant seem to solve completely is that you can still see a bit of an indent where the rows of threads are. On the original garment the pleats are very smooth and regualr and I wonder if they used a different method so as to solve this problem. 


Thursday, 26 April 2012

Pattern Layouts

Original pattern layout 


Today I have been working on how would be best to fit the back panel into the 140cm wide fabric, when the pattern is 147cm.

These are a few ideas:

Putting a seam in the CB

Putting a seam into the CB

Putting two seams where the darts are


I spoke to Graham in tutorial and he suggested that we just take a section out of the back panel down the middle. This seems like such an obvious thing to do! I hadn't thought of doing this as it will take fabric out of the hem width but it will only need to be 18cm at the most, which, in the grand scheme of things isn't that much. I suppose with time and practice these kinds of solutions will come more obviously!

Tuesday, 24 April 2012

Line Drawings


I found doing the line drawings for the robe quite challenging. It is hard to show all the detailing of the robe in two sides but I think that with my pattern drawings (please see workbook) the construction of the robes becomes more clear. 

Thursday, 19 April 2012

Re-scheduling.

Because we have had a set back with the fabric and Abi is going on work experience next week I have decided to update my schedule in order to get the work done before the 2nd fitting and hand in. 

April 2012

Sunday
Monday
Tuesday
Wednesday
Thursday
Friday
Saturday
1
2
3
4
5
6
7
Easter
Easter
Easter
Easter
Easter
Easter
Easter
8
9
10
11
12
13
14
Easter
Easter

0930-1030 Refocus
1000 FIRST FITTING
1700-2000 Library
1000-1600 Planning after fitting. Pattern alterations

15
16
17
18
19
20
21
Buy fabrics
Buy fabrics
0930-1230 POP
0930-1630 Studio work
0800-2400 London research trip

22
23
24
25
26
27
28

Week: Abi on work experience
0930-1230 POP tutorial
0930-1630 Further Research
1500-1900 Work for Marketing
0930-1630 Line drawings pattern diagrams
1600 Blog tutorial
1700-2000 Library work


29
30

0930-1700
Cut out patterns


May 2012

Sunday
Monday
Tuesday
Wednesday
Thursday
Friday
Saturday
1
0930-1900
Mark tack and Cartridge pleating
2
3
4
5


0930-1900
Mark tack and Cartridge pleating
0930- Finish
Sew seams and finish.
1000 2nd Fitting at Town Hall
1200-1700 Adjustments
1000-1600 Continue cutting

6
7
8
9
10
11
12

Uni closed
0930-1230 POP
0930-1630 Studio work
0930-1630 Finalise gown

13
14
15
16
17
18
19

Hand in gown
Hand in POP


20
21

22
23
24
25
26

Hand in SDP