Showing posts with label SDP004 Development. Show all posts

Friday, 18 May 2012

Finished Robe!


I have mixed feelings about this robe; though I am very proud that we managed to recreate this robe independently with hardly any assistance I feel that some of the finishes could have been better.

We have been in the studio a lot to make sure the robe was finished as soon as possible however we kept on running across problems we hadn’t planned for and so we had to unpick a lot of seams. This put us behind schedule and though we worked very hard the finishing touches were left until too late. There was a lot of hand stitching to do at the end and because of time restraints quality lagged. I know that if I had had the time these hand stitched seams would have been strong and neat.

I am really pleased with how the pleats turned out and the fabric works really well to optimise the quality of the silk. I was pleased with the pattern cutting and how we overcame problems. The fur and the velvet looked really good I thought and I am proud that we managed to get on top of a very complicated sleeve.
Putting the sleeve into the armhole was a nightmare. There is a point where the wing meets the curve of the sleeve and we couldn’t get these points on our two sleeves to match which is a shame. I don’t think this is noticeable when the sleeve is on but I know it’s there.  

I think that with time however I will be able to step back from the robe and be pleased with what we have achieved. 

Tuesday, 15 May 2012

Fur issues

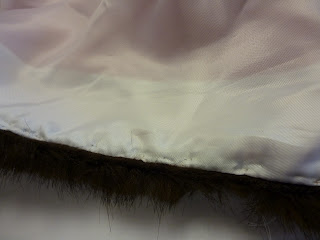
Another issue we have had is how to attach it down the CF of the robe.
On the original it was sewn down both edges. We therefore thought we should  sew the fur on right sides together and then catch the other edge in the CF with the lining.

We cut the fur in half and sewed that together at the CB at a bit of an angle to help it bend around the curve of the shoulder.


When Abi basted it down flat however it pulled the silk into an inverted triangle silhouette.
We asked Kat about this and she said that it was because the weight of the fur didn’t match the weight to the silk and so it pulls at it.
The best way to resolve this would be to create a collar and then swing catch it down to the CF.


We therefore cut out a long facing out the spare fabric we had, which we ironed interfacing to.


We then sewed the fur to the facing, right sides together and basted the fur to the facing so that it laid flat.


We then sewed the fur collar to the CF and stabbed stitched around edge to make the opening neat.


The amount of issues that we had to overcome has been problematic and set us behind our schedule, which in the long run means the last stages will need to be rushed. However I am proud that we managed to overcome and work with the problems that arose. I think my problem solving skills and initiative have definitely improved and I think the solutions we did we creative but in keeping with the robe. 


Curving the Ribbon


On the original gown the velvet ribbon curves around the curve of the wing smoothly. I tried to pin the velvet trim around the curve but couldn’t do this without making pleats as it is not on the bias. I therefore decided to sew the bottom of the curve and then do all the corners before returning to the top of the curve. 


I spoke to Kat about this issue in case there was method of getting the velvet to curve. She told me there was nothing I could do and that I should form small pleats around the curve at regular intervals and that if both sides were the same and all equally spaced then it would look neat and not be noticeable.
I thought that this was the best option and therefore measured 10cm in from the corner of the trim and then placed pins at 2.5cm intervals. I had to experiment with  how was best to spread the pleats and how big each should be. In the end I decided that about 5mm should be pleated every 5cm.


I am pleased with how the pleats have turned out. I think they are barely noticeable and certainly won’t be obvious in photographs of the Mayor. 

Saturday, 12 May 2012

Never spill water on silk...

I have had a very steep learning curve today.

Yesterday I accidently spilt water on the sleeve I have been working on. After initial panic I decided to leave it overnight to see how it would react. I was not sure what to do at the time and thought it best to not get heat by it, which in hindsight was sensible.
Whereas if the robe was cotton the water would have dried without trace silk, silk is delicate and can be stained with water.


The robe was left with a water mark the next day. Though I knew it wouldn’t be very visible over time and without studying the sleeve very closely you can’t see it, however I did not think it was very fair to sell a client a garment with a stain on it.


I thought it would be hard to do stain removal methods without jeopardising the fur and velvet. If I were to remove them the unpicking may affect the appearance of the silk as the embellishments are central in the panel.

I therefore, after consideration, decided to order 50cm more silk and do this section again. I will however be looking into how to remove water stains and try and get this one out so I can use it on a different project possibly.

When ironing the wing to try and get some creases out Abi burnt a section of the fur. The heat of the iron melts the hairs as they are faux, it was right in the middle and we tried to work out a way of remedying it however there wasn’t a way without joining it in the middle which would have looked messy, therefore Abi ordered a metre more fur.
It is really hard working with fur, silk and velvet so closely together. The silk and the lining crease very easily however the fur cannot be ironed and the velvet needs to be ironed on a board and so the combination of the 3 is difficult.

In hindsight it is these mistakes that we made that set us behind our schedule and therefore meant that our finishing hand stitches were not up to standard.

Friday, 11 May 2012

One week to go!

This week has been hectic.

After the fitting went so well on Tuesday morning we came back to the studio to start work on getting the robe finished. My first job was to make the right hand sleeve. It was left unaltered at the fitting so it was just a matter of replicating the other. I find the sleeve construction quite complicated. We realised after the toile fitting that the top sleeve of the silk is top-stitched to the lining of the hanging sleeve down the middle in a curve. It is quite complicated to do as we needed to match the curves on both sleeves as well as stretch a smaller curve of red over a larger amount of lining, which takes some manoeuvring.

When I sewed this line it puckered the lining. I think the needle may have not been sharp enough or the tension on the machine too tight but I felt the lines were quite obvious and ruined the aesthetic of the sleeve. It would be seen on the front of the sleeve and therefore I decided to cut out another piece of lining and do it again. I think this was a sensible decision as I did not want to jeopardise the appearance of the garment with a small correctable mistake.
Since this I have been making sure needles are sharp and replacing any that aren’t to prevent this from happening again.

I think the top-stitching looks neat on the corrected sleeve and the curve is smooth.


I next sewed the thin fur around the edges of the sleeves. We decided to join the fur like this rather than in a triangular join as we thought the fur looked smoother.
We didn’t know how to attach the fur as we have never worked with any before. A lot of the work we have done have been educated guesses or trials backed up with research. It is not the most efficient way of working as it means we often have to undo our work but this is titled the Self
Directed Project and we have been proud of how independently we have been working.

I think the corners look quite neat and the fur has gone around the curve neatly


Tuesday, 8 May 2012

Second and Final Fitting

Today we had our final fitting with the Mayor before finishing it and handing it over in a week.

We were confident that the pattern we had made was now right, so it was just a matter of double checking that it worked and that the Mayor was happy with it.


We initially went into the Mayoress' parlour where there was a robe on display, which was interesting to see.  It was first worn by John Elmes Beale when he was Mayor from 1903-1905 and was the first local Freeman of the borough and was continued to be used until the early 1990s. If I am correct, this is a Lord Mayors robe and is made of black damask silk and decorated with gold trim; on our visits previously it was mentioned that this was the wrong robe to be worn and so it is surprising that they continued to use it for so long. 


We made it aware to the Mayor prior to the fitting what the garment would be like, so he didn't think we were behind. We had left our seam allowances unfinished and there was a 5cm seam allowance on the hem and the CF. We made the gown to the full length before it had been turned up on the original. We tacked teh fur into place down the CF but left it around the neck as we need to sort out gathering it around the curve and we didnt want this to pull on the yoke in fitting. We also decided to only tack on one sleeve for the fitting. 
We did all this in case any adaptations had to be made to the garment. The next stages are finishing the garment with trimmings (fur and velvet) and finishing the edges with linings and adaptations would have to take place before these. 

The Mayor was pleased with the gown, which was relieving. He thought it was much lighter than the original and was pleased with how the fabric looked. We felt we didn't have to make any alterations to the gown as it hung well and looked right proportionally. 
We decided on a length to finish the gown to, which is 10cm above the original hem line. He is quite a tall gentleman and so felt that if we made it to finish a bit under his knee then it would be suitable for any future Mayors/Mayoresses who may be smaller as it wouldn't have to be turned up too drastically. This is good for us with regards to our length of fur as it means we will not have to attach more somewhere, which might have looked clumsy. 

The change over of the Mayor is in a few weeks and so the Mayor needs it by next week. I am going to email Hazel, the Mayor's secretary and organise when would be a good time to bring in the finished robe and then Abi and I will work to that deadline. 

Thursday, 3 May 2012

Second Fitting Set Back

Today we went to our second fitting, though unfortunately, due to unforeseen circumstances the Mayor couldn't be there and we have had to reschedule to next Tuesday.

We have re-jigged our plan to get the work done in time but unfortunately there is little else we can do until we have had the fitting as we do not want to start finishing anything in case there are alterations and we would have to back track. So for now we are going to continue with our essays and hope that Tuesday is successful!

Wednesday, 2 May 2012

Finishing touches prior to fitting - a day of hand sewing


Today we split the load between the two of us - I hand sewed the pleats to the yoke whilst Abi prepared the sleeve for fitting. This worked well as we weren't on top of each other and I think it was faster.

I firstly had to prepare the pleats so that they fitted into the distance of the yoke which is 33cm. They fit tightly in place which looks quite neat. On the toile we felt the pleats were too loose on bits and so you could see the threads, which we didnt want.


I then sewed together the yoke and ironed the CB seam open and ironed the hem up on the design line. I then marked where I was sewing to on the pleats. On the toile we sewed edge to edge but then in the first fitting we realised that the yoke was sewn 1.5cm down the pleats, which was hidden in the lining.


I feel at first I was quite slow at the hand sewing, as I hadn't figured out the best method, however after a while I started doing them all the same as shown in the photos above.
Starting with my thread through the yoke, I firstly put my needle through the pleat, left to right, and then stitched through the yoke, left to right. Then I stitched the pleat again and back to the yoke to move onto the next pleat. This meant that the seam is strong and all the stitches look the same so on the right side it is not that noticeable. It was hard to hand sew for so long as the fabric is so dense.


I am pleased with the end result. I think that they look neat and are strong and durable. 

Tuesday, 1 May 2012

Cutting into Top Fabric

For the last two days we have been cracking on with making the real garment. Our fitting is on Thursday and because of Abi's work experience we had planned to leave the construction to the three days prior to the fitting and really focus on getting it done, which we are on track with.

On Monday we ironed and laid down the fabric and planned how best to cut out the patterns. We covered the table in paper so that no dirt would get onto our fabric. We folded the back panel until it fitted on the folded fabric (as discussed in an earlier post). We decided to leave it as big as possible and have a smaller seam allowance on this pattern, we do not think any adjustments will need to be made and so this will be fine. On the other panel pieces we decided to leave 5cm allowance where possible, just to check our backs, in case anything was wrong.
We are left with about 50cm excess fabric after laying out the pattern pieces, which is good and hopefully we will not need it!
We then cut out the pieces, chalked them and tacked them where appropriate.

It is very nerve racking cutting into £50 fabric. It's essential not to make any mistakes as it would be so costly to replace.


Right side of pleats 0.5cm apart with one layer of wadding
Wrong side of pleats 0.5cm apart with one layer of wadding
Right side of pleats 0.75cm apart with 2 layers of wadding.
Because we altered the width of the back panel this meant that less fabric was to be pleated to the yoke and therefore our samples from before were no longer relevant. We decided to do 2 more experiments, as shown above, one where we added more wadding and the other where we made the pleats smaller. We calculated that every 3.3cm of fabric on the back had to be pleated into 1cm to be sewn to the yoke.
The 0.5cm sample worked well, the 0.75 fitted to the right size but the wadding means the pleats are not tubular and look quite irregular. 
We ironed stayflex to the back seam allowance of the pleats as I noticed that most historic garments had pleated with canvas. This has made the pleats more stiff which looks good. We therefore decided to iron stayflex to the front and seam allowance of the robe where we are going to pleat. (see below)

Stayflex ironed to the seam allowance and top of the back panel. 
Paper guide 
Finished stitching 
Remove the paper 
Pulling the pleating together - bunching up 
Finished pleats! 
We had been practising different ways of using a guideline so that all our pleats were evenly space and straight. On the toile we just drew the grid formation onto the fabric and then sewed. Though we then covered this with wadding and seam allowance so it was hard to follow anyway.
We decided in the end to make a large paper grid to sew through and then we could rip it off. This worked well, though you had to pay attention to what was also happening with the stitching on the reverse as Abi had to undo a whole row of stitches as they were uneven.

One thing that we cant seem to solve completely is that you can still see a bit of an indent where the rows of threads are. On the original garment the pleats are very smooth and regualr and I wonder if they used a different method so as to solve this problem. 


Thursday, 26 April 2012

Pattern Layouts

Original pattern layout 


Today I have been working on how would be best to fit the back panel into the 140cm wide fabric, when the pattern is 147cm.

These are a few ideas:

Putting a seam in the CB

Putting a seam into the CB

Putting two seams where the darts are


I spoke to Graham in tutorial and he suggested that we just take a section out of the back panel down the middle. This seems like such an obvious thing to do! I hadn't thought of doing this as it will take fabric out of the hem width but it will only need to be 18cm at the most, which, in the grand scheme of things isn't that much. I suppose with time and practice these kinds of solutions will come more obviously!

Thursday, 19 April 2012

Re-scheduling.

Because we have had a set back with the fabric and Abi is going on work experience next week I have decided to update my schedule in order to get the work done before the 2nd fitting and hand in. 

April 2012

Sunday
Monday
Tuesday
Wednesday
Thursday
Friday
Saturday
1
2
3
4
5
6
7
Easter
Easter
Easter
Easter
Easter
Easter
Easter
8
9
10
11
12
13
14
Easter
Easter

0930-1030 Refocus
1000 FIRST FITTING
1700-2000 Library
1000-1600 Planning after fitting. Pattern alterations

15
16
17
18
19
20
21
Buy fabrics
Buy fabrics
0930-1230 POP
0930-1630 Studio work
0800-2400 London research trip

22
23
24
25
26
27
28

Week: Abi on work experience
0930-1230 POP tutorial
0930-1630 Further Research
1500-1900 Work for Marketing
0930-1630 Line drawings pattern diagrams
1600 Blog tutorial
1700-2000 Library work


29
30

0930-1700
Cut out patterns


May 2012

Sunday
Monday
Tuesday
Wednesday
Thursday
Friday
Saturday
1
0930-1900
Mark tack and Cartridge pleating
2
3
4
5


0930-1900
Mark tack and Cartridge pleating
0930- Finish
Sew seams and finish.
1000 2nd Fitting at Town Hall
1200-1700 Adjustments
1000-1600 Continue cutting

6
7
8
9
10
11
12

Uni closed
0930-1230 POP
0930-1630 Studio work
0930-1630 Finalise gown

13
14
15
16
17
18
19

Hand in gown
Hand in POP


20
21

22
23
24
25
26

Hand in SDP